Showing posts with label hairstyles. Show all posts

Tuesday, May 15, 2012

Double braid

 I run around A LOT for my job as a nanny for two little boys and a newborn baby girl (I usually have the boys, not the girl). In any given two hours, we will play a bit of football, baseball, soccer, golf, basketball, and tennis. It's crazy! And fun :)


So I need my hair back and away from my face, hence the braids.


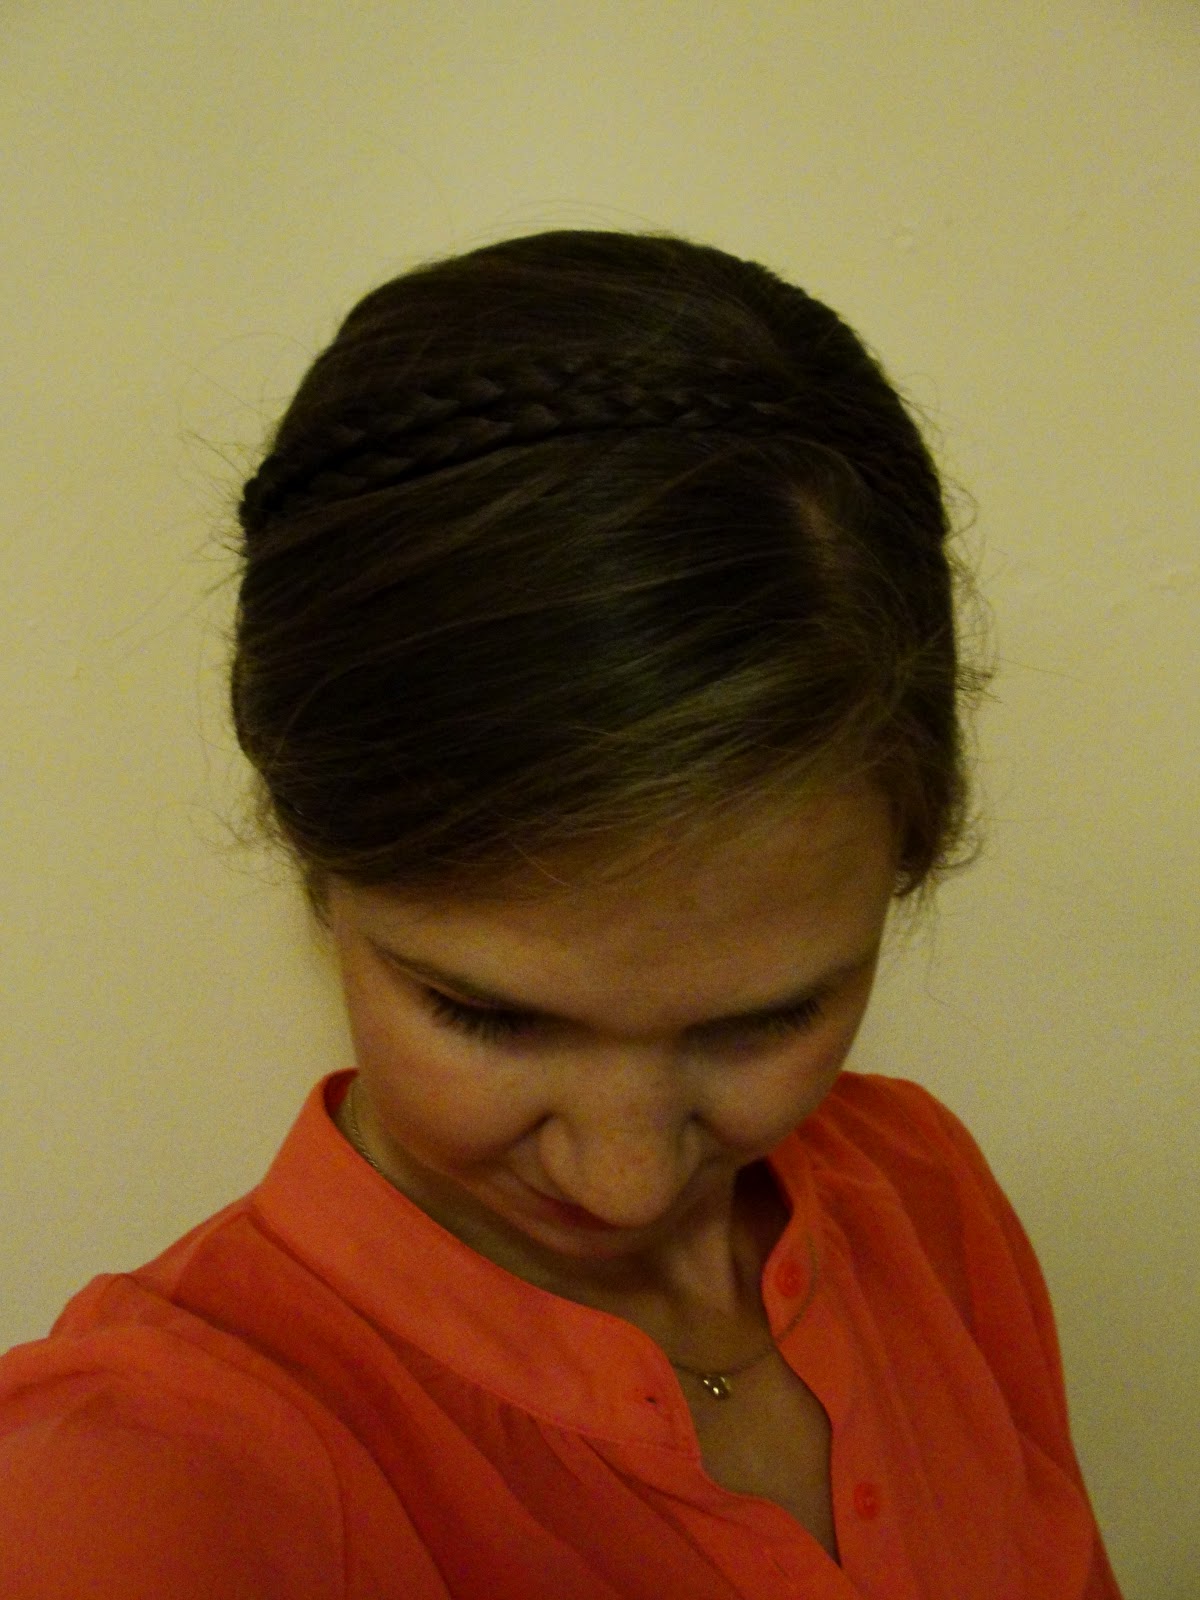
I started with a Dutch, French braid (braiding in reverse, but also a French braid, so it's Dutch-French braid??) behind my left ear, and another coming across my scalp from right to left. 


I pinned them together below my left ear, then twisted them and fastened with a little rubber band. Long hair is so much fun to play with :)

Thursday, May 10, 2012

Curling iron to wand

So I really love the look of wand curls (like these), but I didn't really want to spend the money to buy a wand.


So I decided to make my own!


I removed all of these parts from my curling iron, and I was left with a wand!


It's a little bit larger than the wand I had used before, so I ended up with more relaxed curls.
 

I never really used that curling iron anymore, and now I will use it all the time!
 

Yay! 


Tuesday, May 8, 2012

Date night hair

 Finals are over! I am free! It's officially summer!
Time for date night, complete with date night hair!


Double braided headband with a side bun.


Braided headband, like this one here.
I started the braids on the side with the bun (the bun covers the spot where the braids come from) and fastened them with a tiny rubber band and bobby pins, pulling the hair in front over to cover them.


View from behind.
I made a twist with my hair and twisted this around to make the bun, securing it with my Spin Pins.


 Side view.


Off for dessert!


Tuesday, May 1, 2012

A slightly different braid...

Stress-playing with my hair again (finals are looming over me). I guess you could call this a variation of a braid since I was wrapping three sections of hair around each other.


I started by dividing my hair into three sections and securing these with thin rubber bands.
 

 I wrapped the left and right sections over the middle one, and wrapped these sections under the middle one.
I continued this process (left and right over, left and right under, never moving the middle section) until I reached the end of my hair and I secured this with another little rubber band.


A little bit later I snipped the three rubber bands at the top (not the one holding everything together at the bottom), but I didn't get a chance to take a picture of that. Made it look a little more polished though :)

Thursday, April 26, 2012

Another shot at no-heat curls

Here we go again. I tried the sock bun method which was good but didn't last through the day. When this popped up on Pinterest, I decided it was worth a shot. I like having options when I don't want to use heat to style my hair.


I started with slightly damp hair...


...and took two strands from right above my ears, twisted them, and tied them back with a tiny hair tie.


Then, I took a one-inch section and wrapped it around the strand I had already pulled back. I secured it with a bobby pin, and did the same with the next section.


When I had completed the whole head, I was done for the evening.
 

The next morning I woke up, unraveled my work from the night before...


...and this is what I had!


Cute curls, I was impressed!


And they lasted all day!


Monday, April 9, 2012

Easy updo


I've been trying to do these styles that I've seen a bunch on Pinterest...

{source}

Pinned Image
{source}
...but to no avail.  I have too much hair to do either of these styles, it's both too thick and too long. I decided that I would have to come up with my own version of a hairstyle with multiple twisted buns.


I started by dividing my hair into three sections, and twisting those around and around until they made coils.


Then I took the lowest part of the coil, brought it directly up, and pinned it (for each of the three coils).


Side view


View from below.

Thursday, April 5, 2012

Waterfall flip-through

Playing with my hair again... I've always liked the look of a flip-through, so I experimented with doing multiple flips through, like a waterfall version of the flip-through. 


This look can be accomplished by gathering a small portion of hair on the crown of the head with a rubber band, dividing the hair between the scalp and the rubber band into two sections, bringing the loose hair up and down through the hole, pulling it through, and repeating with multiple sections farther down the scalp.


Wednesday, March 21, 2012

Knotted French

Playing with my hair tonight, and ended up tying knots in it! It worked out well though, as I created a hairstyle I've never seen before, a Knotted French. 


Instead of doing a French braid from right to left (from the view of the observer), I knotted from right to left, starting with a small knot, adding sections of hair until I was across my head. Then I kept knotting, and made a knotted tail.


Here's how it looks without me holding it. (Please excuse the tags, I didn't notice until I had already taken the pictures!)

Who knew knotting your hair could be a good thing?

Wednesday, March 7, 2012

Full waterfall

Survived my test, and left it feeling pretty confident :) My favorite way to de-stress post-test is to play with my hair and my nails. Here's what I came up with tonight, a waterfall braid from each side of my head meeting in the middle, and a flower to finish it off!


I'm so addicted to waterfall braids, and hair flowers too :)

Monday, February 27, 2012

Spin pins

I've been wanting spin pins for forever, but as soon as I saw them at Target I was disappointed. $7?? For two large twisted bobby pins? Come on. So I debated, I picked them up and put them back many a time, until I finally just bought them. 


My mother has had success with them and I have been loving my modern updo pin so I decided to go ahead and get them. 


So glad I did! These pins are my new favorite toy! They hold my hair very well, and keep the shape of a bun much better than a hair tie and bobby pins do (in my hair at least).


Kind of hard to explain how it works with words, but basically you make a bun out of your hair and spin the pins in clockwise at the base of the bun, from opposite sides (my favorite part of the tool is how easily it comes out, all it takes is a few counter-clockwise spins and it's free). 

For a better visualization, this video includes the spin pin until 0:25 seconds.

Friday, February 24, 2012

Braid up to a bun

This has been a double-test week for me, so I've been rocking the un-straightened, un-curled hair. In order to avoid just a simple ponytail over and over, I have turned to this!


I started by dividing my hair in half (top and bottom). I took the bottom half and French-braided it, starting from the bottom and working up.


I made a bun with the top half,


and wrapped the braid around the bun.


Voila!

Saturday, February 18, 2012

Twists and braids

Recently I got some of those teeny tiny plastic hair ties that I haven't owned since childhood. I have seen so many hairstyles around and on Pinterest that would be so much easier to achieve with those hair ties, so I decided to give in to the urge and buy the sparkly ones :)

So today's hair style was this:


I started with straight hair, with the crown teased a bit (but you can't really tell from the picture)


 Then I took a chunk of hair from above each ear, twisted upward on both sides, and secured in the back with a tiny sparkly hair tie :) To finish off the look, I added a little flower (2/$1.50 at Forever21).


Partway through the day though, I decided to play with the style a bit and turned it into two braids from each side , secured in the middle with a tiny sparkly hair tie, and added a flower again. Super quick, put-together hair style! 

Tuesday, February 7, 2012

Braided headband hairstyle

This is a surprisingly easy hairstyle, it's cute, and has enough staying power to make me a devoted fan already.


It's basically making a headband out of your own hair.


Braided hair, that is. I started by clipping back the top half of my hair. 


I took a small chunk of hair from above my ear and, holding it up vertically, braided it.


I used a clear elastic at the end of the braid, and brought it down to the corresponding spot above my other ear. I kept the braid in place with two bobby pins.


Once I let my hair fall naturally, all signs of the hardware were covered. From there, I backcombed the hair at the crown of my head a bit, for a little extra oomph. And, within 3 minutes, had a cute hairstyle that lasted all day!

Related Posts Plugin for WordPress, Blogger...